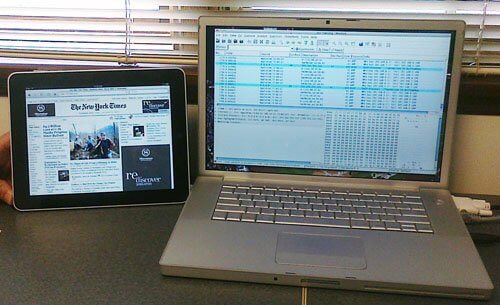
For a project I’m working on, I was wondering how a particular video-related feature on Apple’s new iPad works. In order to figure that out, I thought it would be interesting to connect a network sniffer with my shiny new iPad so I could capture and analyze all the Wi-Fi network traffic flowing to and from the device.
Although I did this with the iPad, the technique below is not specific to it; you could use the approach below to capture network traffic to any Wi-Fi-enabled mobile device, like an iPod Touch or a Palm Pre.
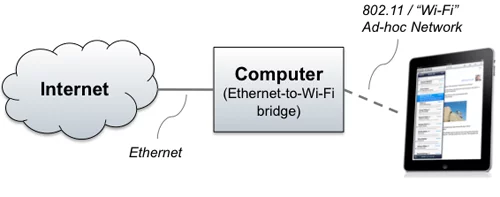
An easy way to do this is to configure a computer to serve as a bridge between an Ethernet network and an ad-hoc Wi-Fi network. Then, by running Wireshark or another network sniffer on the computer, you can capture the packets as they flow through to the mobile device on Wi-Fi.
My computer is a MacBook Pro running OS/X 10.6 “Snow Leopard,” but the same concept should work on Windows or on earlier OS/X versions, although the dialogs might look a little different. There are three steps:
- Configure the computer to act as a Wi-Fi Bridge
- Connect the iPad to the computer’s ad-hoc Wi-Fi network
- Capture the packets
Contents
Step 1: Configure OS/X as a Wi-Fi Bridge
First, we need to configure OS/X as a Wi-Fi bridge. To do this, select “Create Network” from the Airport drop-down menu. This dialog appears:
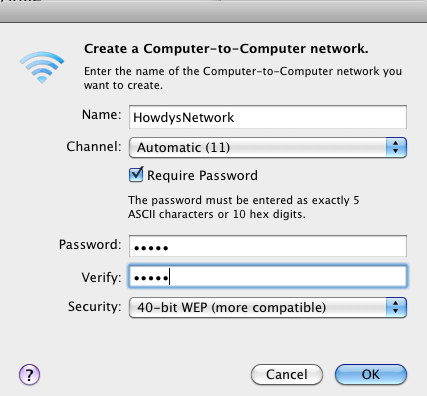
Type a network name, and, if you like, assign a password. I assigned a password just so I could ensure that only one device was connecting to my bridged Mac. We are nerds here at Cardinal Peak, so we tend to have a lot of devices floating around our office!
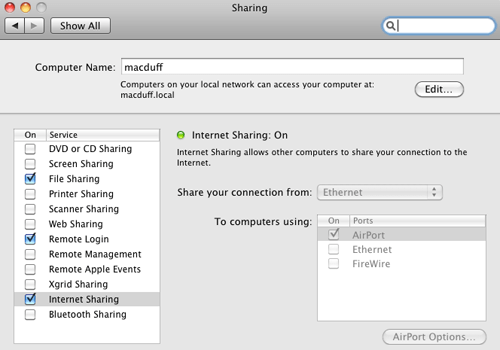
At this point, the iPad would be able to connect to the computer, but the computer is not yet configured to bridge the packets from the 802.11 network onto the Ethernet network. To configure bridging on OS/X, you need to turn on what Apple calls “Internet Sharing.” Go to System Preferences and select the “Sharing” option. Turn on Internet Sharing, and set it up to “Share your connection from” “Ethernet,” “To computers using” “AirPort”:
Step 2: Connect the iPad to the ad-hoc Wi-Fi network
Next, you’ll need to configure the iPad to connect to the ad-hoc Wi-Fi network you just created. This is pretty easy: Go to Settings, and then Wi-Fi. You should see your new ad-hoc network in the list — in my case, I’m looking for “HowdysNetwork”:

Just tap on the ad-hoc network. If you elected to use a password, you’ll be prompted for it.
You can confirm your iPad’s network configuration by tapping the right arrow next to the network name:
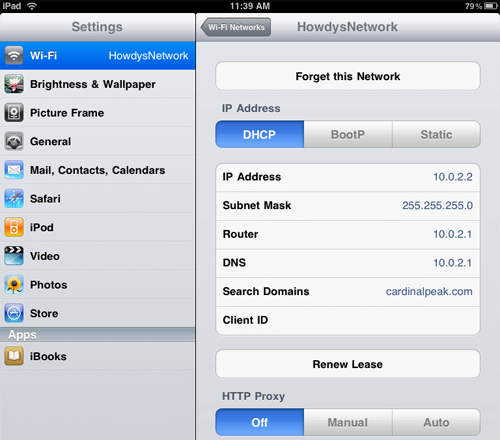
Good — we have an IP address, but more importantly, we have reasonable entries for the Router and DNS server, as well.
Next, you should test out your bridged network connection by bringing up Safari on the iPad and proving you can visit a web site.
Step 3: Capture the Packets
The final step is to start up Wireshark on your computer and attach to the Wi-Fi interface. You normally need to start Wireshark as the super-user in order to have enough rights to capture traffic. There’s probably a cool way to do this graphically, but being an old-school Unix guy, I always bring up a Terminal window and type sudo wireshark &.
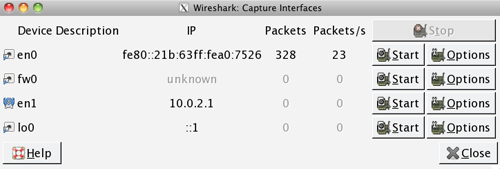
We want to capture packets on the Wi-Fi interface, which on my Mac is device en1. Click the leftmost button on the Wireshark toolbar, and then click “Start” next to device en1:
Now you should be all set — do something on your iPad to cause network traffic, and confirm that you see it showing up in the Wireshark window!