In the past, we have developed software for Zigbee and Bluetooth Low Energy (BLE) devices and also worked with devices that combined Wi-Fi with either Zigbee or BLE, where Wi-Fi was used primarily as a gateway to the internet.
But we had never worked on a connected device that mixed BLE and Zigbee and have wanted for some time to test-drive Silicon Labs‘ (Silabs) dynamic multiprotocol (DMP) offer. With DMP, a low-cost, low-power device can support both BLE and Zigbee simultaneously on the same chip and radio.
In a previous blog, we worked through a simple DMP range test precompiled demo that had two Zigbee devices communicating with each other over Zigbee and with a smartphone application over BLE. In this blog, we delve a little deeper, building and testing the “switch/light” Silicon Labs example, which demonstrates how IoT-connected lighting can be switched on and off by either a physical switch running Zigbee or by a BLE application on a smartphone.
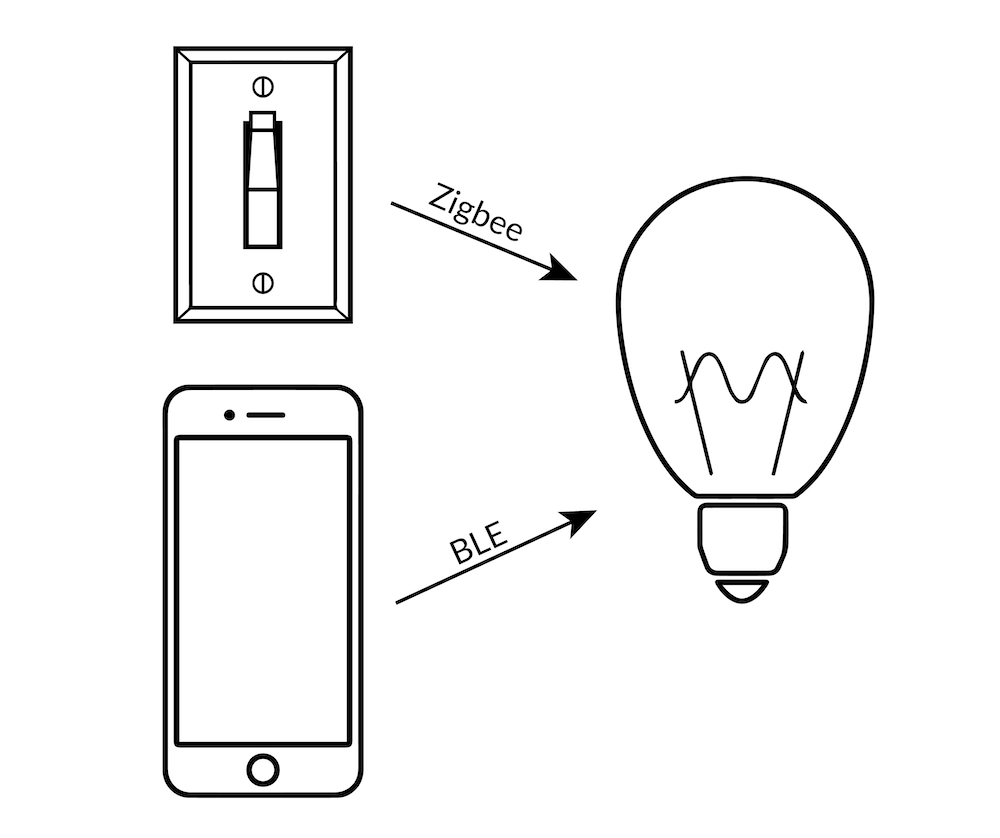
Without DMP, supporting BLE and Zigbee simultaneously in the lightbulb would require two radios and two protocol stacks running on two separate processors, increasing complexity and cost. DMP enables an elegant and effective solution.
Contents
How To Build the IoT Lighting Control DMP Demo
For this demo, we used the same product kit SLWSTK6006A from our previous blog. The intent was to find and run a prepackaged demo as described in this user guide, but unlike the EFR32xG12 radio boards in the SLWSTK6000B kit, there is no canned switch/light demo available for our EFR32xG21 boards.
So, to get the demo running, we built it with Simplicity Studio. The following sections describe how the demo was built and some trouble areas we discovered.
Download and Install Simplicity Studio
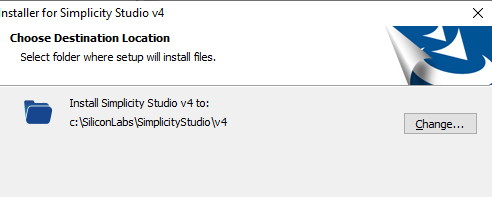
- Download and install Simplicity Studio (requires web login).
- Installs to:
- Go ahead and log in from Studio to get the latest updates.
- Do “install by device” > select kit > EFR32xG21 2.4GHz mesh networking kit (SLWSTK6006A).
- Then install by product group and pick “Wireless & RF.” Go ahead and include BT, Zigbee, Proprietary and Z-Wave. You may need to register the dev kit to get access to some of the content.
- Go to the “My Products” window and search for EFR32xG21 mesh network kit:
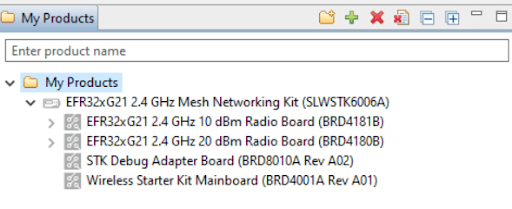
- This brings up a suite of resources applicable to the dev kit.
Building the IoT Lighting Demo Application
To run the DMP switch/light application, we need to build two projects: one corresponding to the connected switch device, the other to the connected light device. In this section, we describe how we built the IoT light.
Demo Documentation
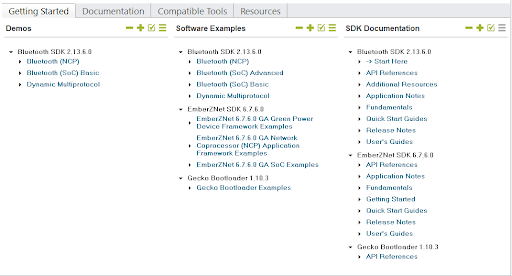
- In Simplicity Studio, go to the Documentation tab > Quick Start Guides to find the demo setup document “QSG155: Using the Silicon Labs Dynamic Multiprotocol Demonstration Applications in GSDK v2.x.”
- This document describes the multiprotocol lighting demo using EFR32MG12 radio boards instead of EFR32xG21 boards, but the setup and demo instructions are similar.
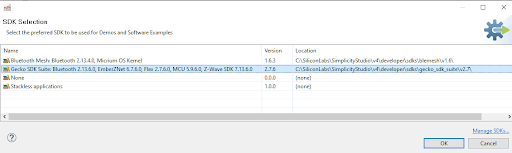
Pick an SDK
- Pick an SDK. From the Welcome screen, go to Getting Started > Change Preferred SDK and select the Gecko SDK Suite, which contains the libraries and examples for Bluetooth, Zigbee and Z-Wave.
Install the Proper Version of IAR-EWARM
To build for the Gecko SDK, we need the IAR-EWARM toolchain, which must be downloaded and installed separately from Simplicity Studio. IAR-EWARM offers a 30-day trial.
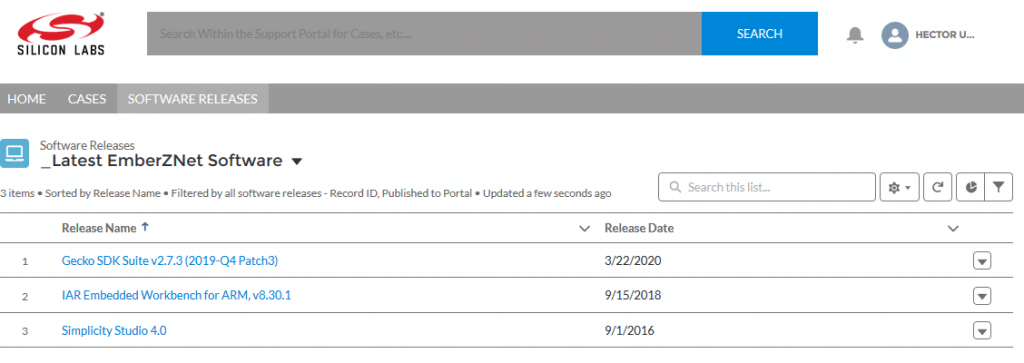
- In Simplicity Studio, go to the Resources tab > Technical Support. This brings up a support webpage.
- On the support webpage, go to Request Support > Software Releases > Latest EmberZNet Software (may require login).
- At this point, we see something similar to the following, which can be used to locate the required version of IAR-EWARM.
Per Silicon Labs documentation, the purpose of going here was to obtain the correct version of the IAR-EWARM package, but the IAR-EWARM link above doesn’t navigate to the IAR site, and we could only find one version (8.50) of the package offered as a free trial.
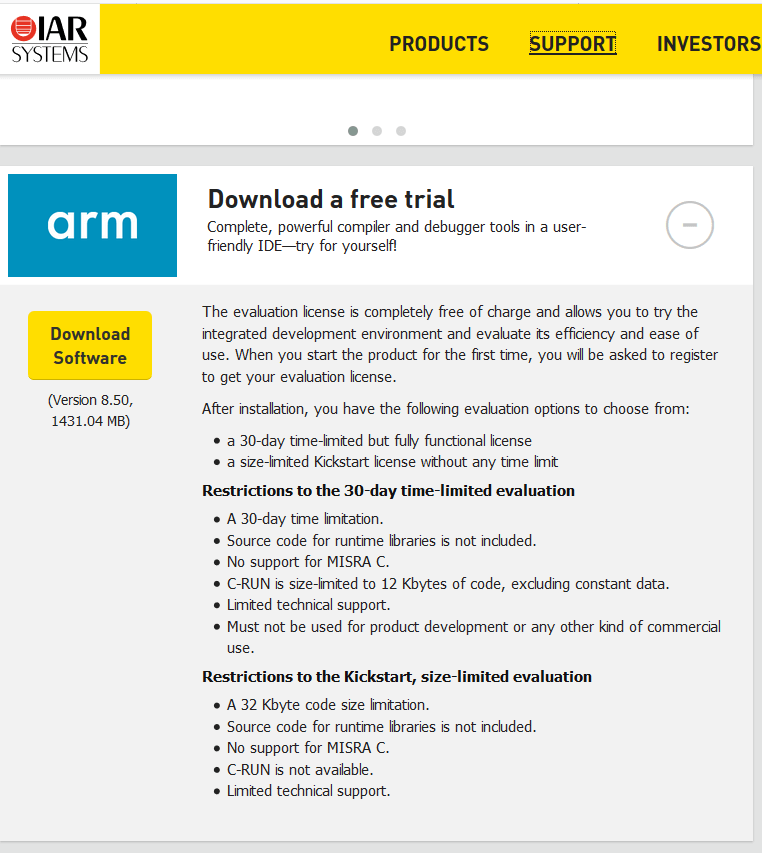
Download and install IAR-EAWARM, accept all defaults and hope that this version will do the job.
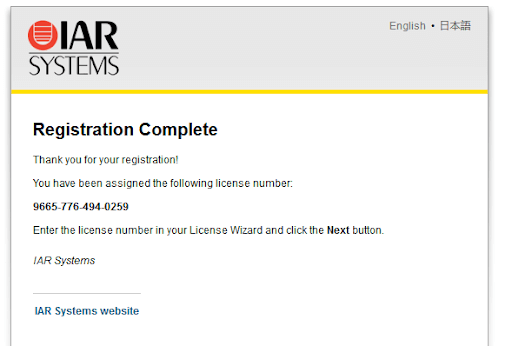
Get the 30-day license:
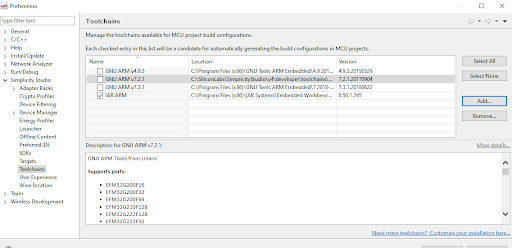
Link IAR-EWARM in Simplicity Studio
In Simplicity Studio, go to Window > Preferences > Simplicity Studio > Toolchains:
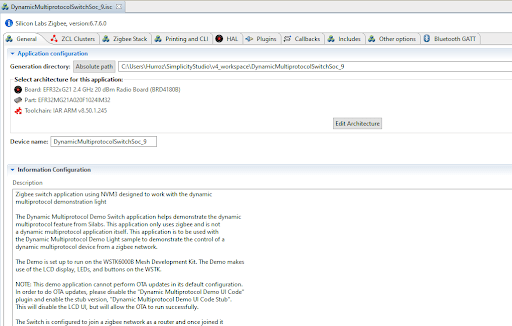
Generate the DMP Switch Project
- On the upper right panel, click to go to New Project > Silicon Labs Zigbee > EmberZnet 6.7.6.0 GA SoC 6.7.6.0 > DynamicMultiprotocolSwitch (pick defaults set automatically from previous settings). We see something like:
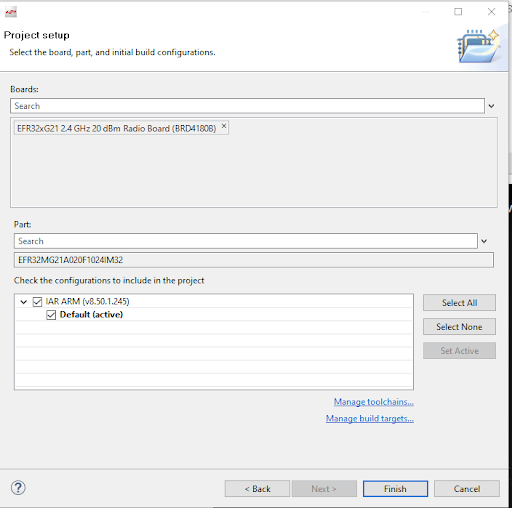
- Click Finish to create an IDE project and switch to the IDE view:
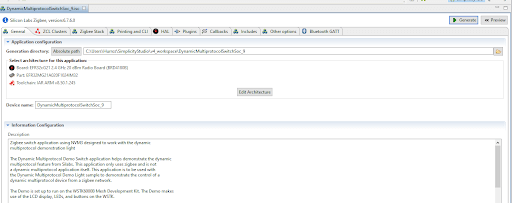
- Click Generate and OK for overwriting, and you should see:
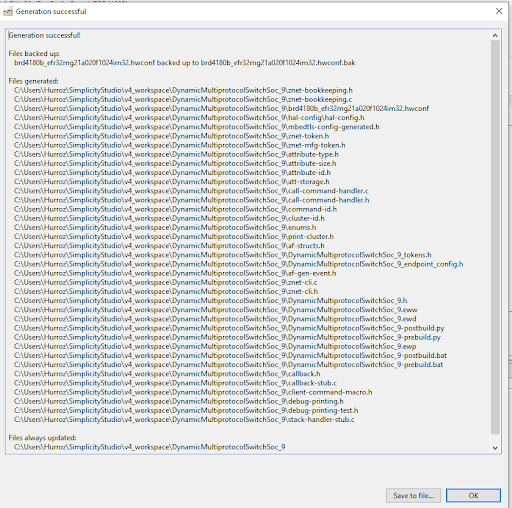
- Click OK:
Build the DMP Switch Project
- Go to Project > Build Project.
- From there, we should see build output on the console with a good “Build Finished” message.
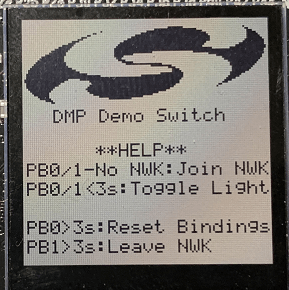
- Make sure the USB is connected.
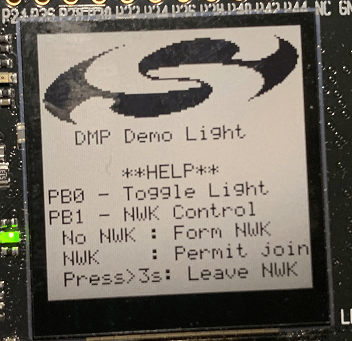
- Click Run > Debug to flash and run the project. At this point, the device display should show a help message for a few seconds, followed by the main demo screen:
Build the DMP Light Project (Trouble Ahead)
For the second IoT lighting device, we repeated the above steps, using the DMP light project instead of the switch. However, we hit a snag.
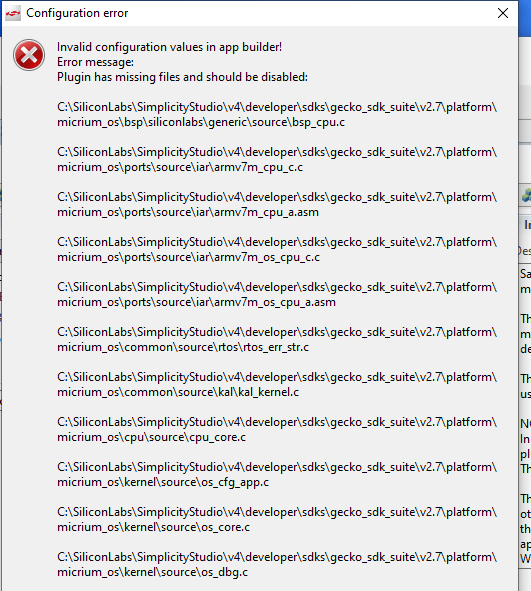
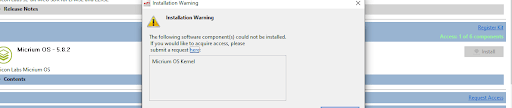
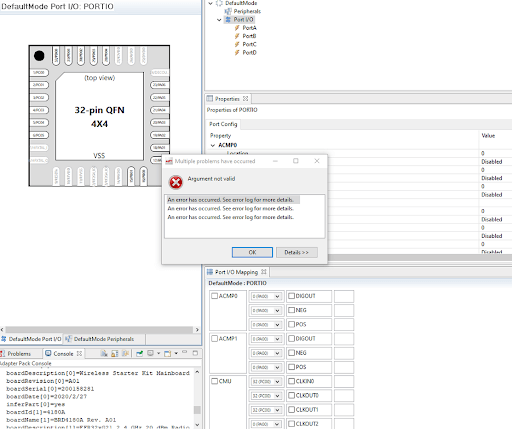
This is what we saw after clicking Generate. It looks like we are missing the Micrium kernel, part of the RTOS that is used to help implement DMP:
When we go back to the Package Manager > SDKs > Micrium:
- my kit cannot be registered for Micrium, and
- the install action fails after processing validation.
The error message below indicates that we cannot install the kernel source despite the fact that the Simplicity Studio shows that we do have the correct access permissions.
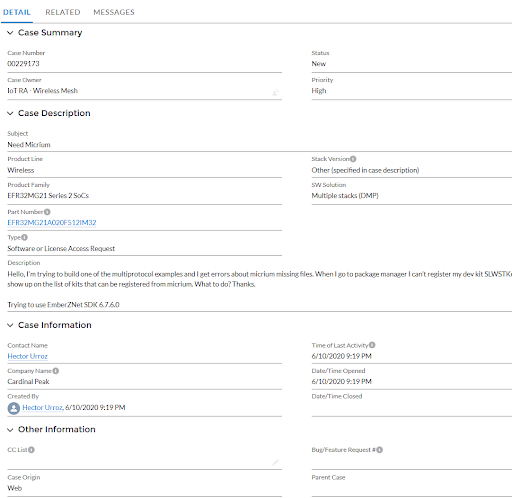
File a Support Ticket
Here is the ticket we filed. Silicon Labs offered good support. After a couple of iterations, they found a problem in their backend validation servers and fixed the issue.
Build the DMP Light Project Again
I tried the IoT lighting project again and got a good build. Here are the device’s screens after flashing:
Help screen for a few seconds:
Main screen:
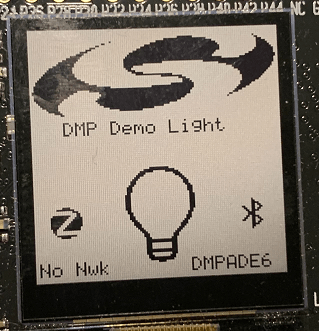
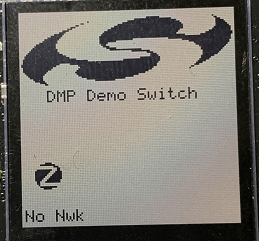
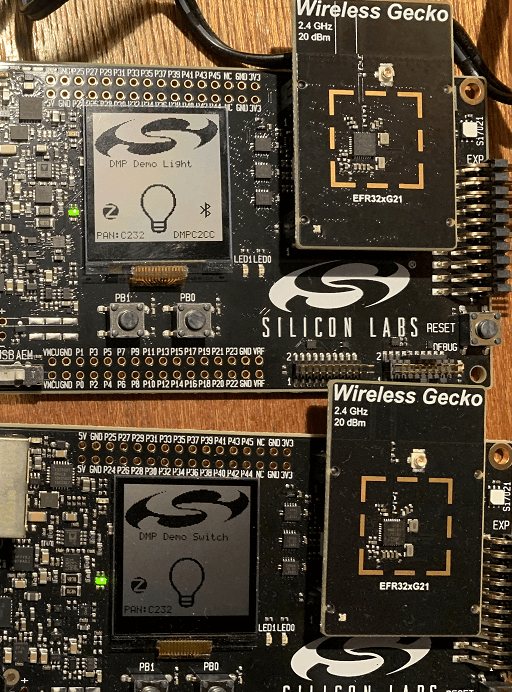
In this demo, the Zigbee coordinator is the light device seen in the figure above, where the display shows:
- A Zigbee side indicating the network has not been formed yet.
- A Bluetooth side showing a part of the device’s Bluetooth address.
- A lightbulb icon to represent the state of the “light.” In the picture above, the light appears turned off.
At this point, we should be able to use the PB0 button to toggle the light, and PB1 to form a Zigbee network. We should also be able to use the Wireless Gecko smartphone app to create a Bluetooth connection to the device.
Demo Does Not Work
The light device does not appear responsive:
- PB0 does not toggle the light.
- PB1 does not form a Zigbee network.
On the switch device, the display shows a PAN, indicating it has joined a network, but we cannot get it to leave the network using PB1.
Also, the Wireless Gecko smartphone app sees the device but fails to connect.
Open a Support Ticket
We opened a support ticket to report the problem. Tech support was responsive, and after a few emails, we were able to resolve the mystery of the buttons:
- There are two versions of the 20 dBm radio boards: BRD4180A and BRD4180B. According to tech support, the I/O pins for the buttons are LEDs swapped between the two boards.
- When we selected SLWSTK6006A as our kit in Simplicity Studio, the tool picked the B boards:
- The code generation step in the IDE generated code for the B board.
- But we actually had the A boards in our kit (look in the back of the board), so the buttons and LEDs were nonfunctional due to the swapped pins.
We might have saved ourselves the trouble by checking the generated radio board numbers, but in our defense, we trusted that Simplicity Studio, with all its hand-holding magic, would have generated the correct configuration for our kit. To fix the problem, we re-created the light project and selected the nondefault board number in the setup step.
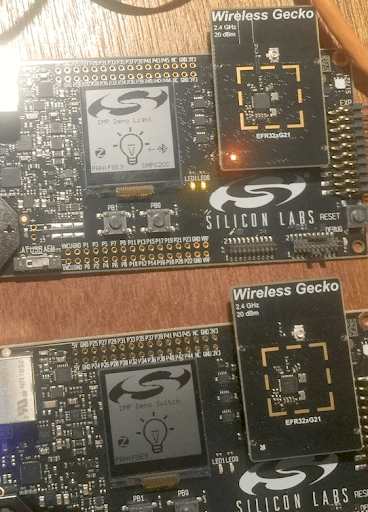
Zigbee Portion of the Demo Works
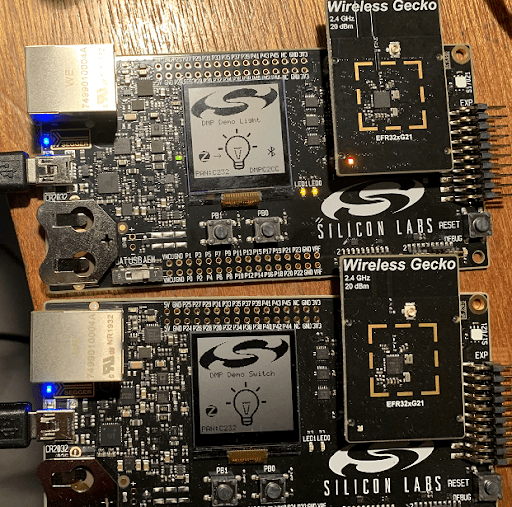
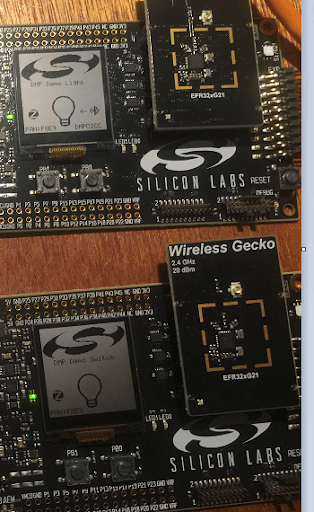
After flashing both cards again, the figure below shows the light (top) and switch (bottom) devices after the light created a Zigbee network that the switch joined. The displays show the Zigbee PAN ID:
The following figure shows the light device turns “on” after we push PB0 on the switch device. We can turn the IoT light on and off by pressing the switch button repeatedly.
BLE Demo Does Not Work
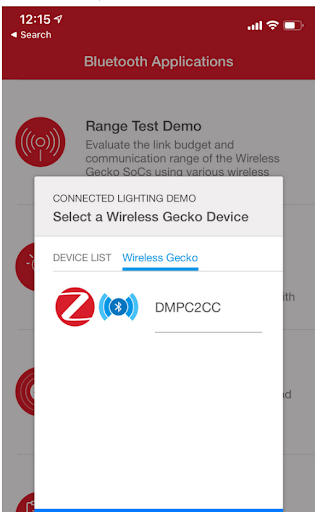
In the previous figures, the light device shows the Bluetooth icon, and the device’s advertised name (right bottom part of the display). When we launch the Wireless Gecko smartphone app, we can see the device in the Connected Lighting Demo screen:
But we cannot connect:
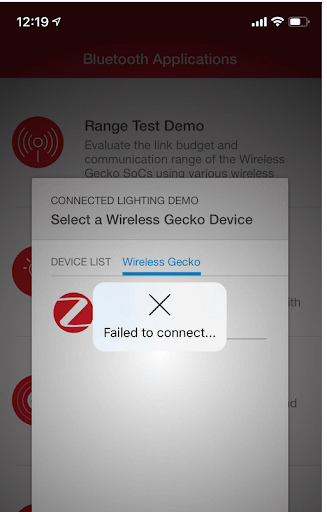
Bluetooth does seem to be working at some level:
- The phone is able to see the device’s advertisement.
- While trying to connect, the Bluetooth icon pulsates and then stops after the failure.
We were able to connect when the Zigbee network was not yet formed, but the phone app was not responsive and showed a cryptic “Source: Unknown” message:

Back to Tech Support
We went back to tech support, and our previously opened ticket was forwarded to their Bluetooth team. We did hear back, and after a couple of rounds, they had a solution that required changing a clock source in the light example to match the board configuration. We attempted to change the source via the configurator tool in Simplicity Studio but had trouble getting the tool to run properly:
So we made the change directly in the project’s hal-config.h:

The Full IoT Lighting Demo Works
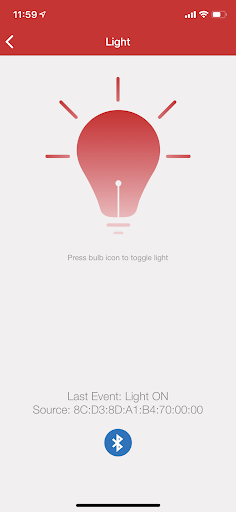
After flashing the board with this last change, we are able to use the Wireless Gecko smartphone app to connect to the light device and switch the light on and off. The following figures show the phone after making the connection:
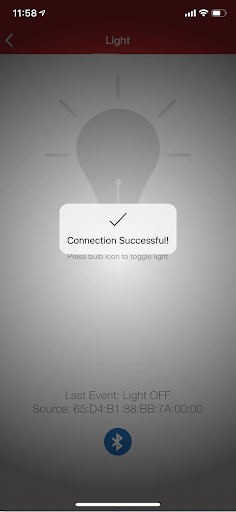
With the light turned off:
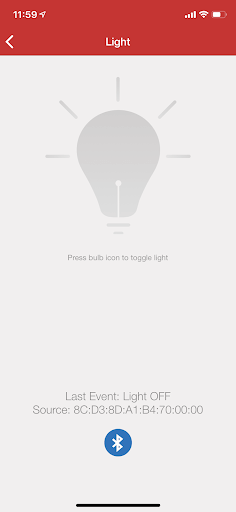
When we touch the bulb on the phone, we see the light device turn on, so we have BLE working between the phone and the light device.
We can also see that the switch device reflects the correct state, indicating Zigbee acting between the light and switch devices. Finally, we can press PB0 on the switch device to toggle the light, and the state will be correctly reflected across all three devices.
Given our past excellent experience with Simplicity Studio, the demo setup was not quite as simple as we had expected:
- Simplicity Studio did not have precompiled images targeted to our SLWSTK6006A development kit.
- We had a license validation issue due to a Silicon Labs’ back-end bug when trying to build the demo in the IDE.
- There were A and B variants of our radio boards, with incompatible pin assignments, and we relied too much on Simplicity Studio to pick out the correct defaults for our dev kit.
- The Bluetooth part of the demo did not initially function properly due to an SLWSTK6006A-specific misconfiguration in Simplicity Studio that required a manual fix from Silicon Labs tech support.
We believe the trouble was caused by the relatively recent appearance of the SLWSTK6006A kit, and the very capable Simplicity Studio was left a little behind. However, we received excellent support from the Silicon Labs team. They remained in touch at least once a day and kept us moving forward.
In the end, we replicated Silicon Labs’ Dynamic Multiprotocol switch/light demo, which succeeded admirably in showing how one IoT lighting device can support both BLE and Zigbee stacks over a single time-shared radio, resulting in simpler and more economical designs for some applications.
Learn more about Bluetooth LE and IoT testing on our page Zigbee, Matter, Thread & Bluetooth Mesh IoT Testing Services.